|
The Battle Against Refrigerator Odors
It’s no surprise when you notice a nasty odor from your garbage can, especially when it’s full. But it might be a surprise when you get a whiff of a nasty smell emanating from your refrigerator, which should normally be a haven of delicious foods and enticing aromas. Your refrigerator naturally fights off offending odors because of the cold temperature, which limits bacteria growth. Most bacteria growth is pretty slow and not as offensive as others. But depending on the source (meat, milk, proteins are quick to become offensive), the resulting odors can be powerful and require immediate action. Simple and easy A complete cleaning of the fridge with hot detergent and water naturally removes some odors. Get into those crevices where liquids from food might have invaded. You might have to wet those areas with hot water and detergent and let it dwell for several minutes. Many nasty odors can come from small amounts of contaminants. For lingering odors, leaving a container, small cup or bowl, of white vinegar in the fridge will continue to neutralize bad odors. For this to continue to work replenish the vinegar every few days. Eventually, you can stop using the vinegar treatment. Some recommend wiping down all surfaces with vinegar as well. And, of course, there is the proven method of leaving a box of baking soda open in the fridge, which absorbs odors. It does this due to the ability of sodium bicarbonate to attract odor causing molecules and holding onto them. Stirring the baking soda around occasionally or replacing the box is necessary. Tough situations You must also realize is that removing odors from a fridge in use is much different from one that has been sitting unused for a period of time. If odors are severe, such as from an unused refrigerator being put back in action, you might have to resort to ozone generation. You can buy or sometimes rent the equipment. Using them is simple. Put them inside the fridge, keep the door shut as much as possible, and let it run for the recommended period of time for that generator. The odor will most likely be magically gone! Of course, the best thing to do for all your cleaning needs is call your favorite cleaning company. After all, it pays to call a pro! Removing Hard Water Stains
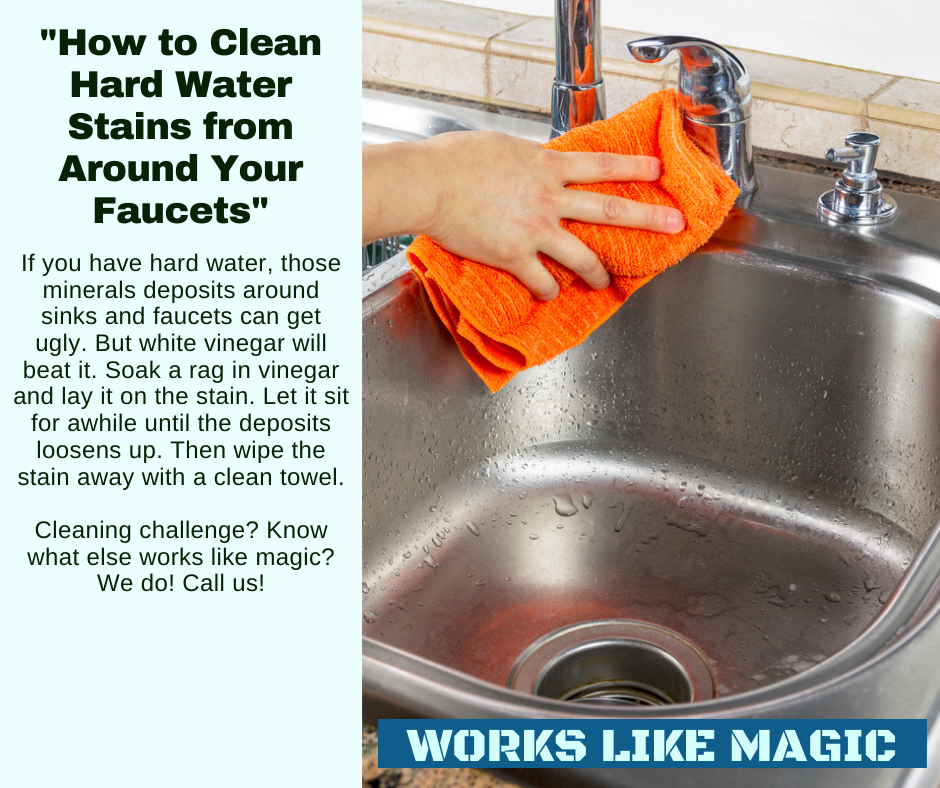
Unsightly hard water stains can affect many surfaces and can be a challenge to remove. Hard water stains are based on the mineral content of the water in a building or home. It all comes from the ground, so if mineral content is high in ground water, then mineral content in the water you use is going to be high. Water softeners will solve this issue, but without a water softener system, you will occasionally deal with hard water stains and the challenges inherent with removing them. Typical spot removers or household cleaners will not affect hard water stains, because they are mineral based. Here are some tips to remove them safely and enjoy a household free of hard water stains. Identify You will see hard water stains on sinks, around faucets, and even on textiles that are affected by a plain water spill. They are usually white but can be colored stains as well. If the stain is significant, you can even feel the texture of the stain. This means a bit more work may be involved removing the stain. Remove If the surface allows it (make sure you don’t scratch a hard surface and damage it) try scraping away the bulk of the hard water stain, if it has built up enough for you to do this. For a cleaning agent, start safe and use plain white vinegar. Apply the vinegar to the surface and allow several minutes dwell time, remembering that vinegar can temporarily adversely affect copper surfaces. Scrub carefully and see if the vinegar is reacting with the hard water stain. This may remove most hard water stains. If that doesn’t work, obtain a stronger acid, such as from your hardware store, that is for cleaning purposes. Wear safety gloves applicable for strong acid cleaners. Apply carefully and this should remove the hard water stain. You can keep increasing the strength of the acid cleaner until the stain is removed, but always be careful with skin contact and vapors. Follow manufacturer directions. Neutralize As with any strong cleaning agent, neutralize after cleaning. This can be with a water rinse and drying with a towel. Very strong acid cleaners should be neutralized with a product for that specific purpose. But when cleaning challenges are beyond your abilities, do the right thing. Call a professional cleaning company. After all, it pays to call a pro! Stinky Garbage Disposals
Your garbage disposal is probably one of the devices in your home you seldom think about. After all, it’s hidden from view, you activate it with a simple flip of a switch, and it does its job. But if it ever fails you, it quickly jumps to the top of the list of things you value most. Your garbage disposal is, obviously, fitted to the drainpipe of your kitchen sink, and it grinds up all kinds of food waste, gunk, and more. It works diligently to gobble up and push into the sewer system what you should put and what you should neverput into a disposal, which shortens the life of the device. Safety first It should be obvious to most that putting your fingers into the garbage disposal is a bad idea. Even when the unit is turned off, never reach in an attempt to dislodge or remove something that is hindering the garbage disposal’s efforts. And when working in the disposal unit, always unplug or turn off the power before proceeding. It’s always best to call a pro in those circumstances when a simple, quick fix is not an option. Disposal tips While your garbage disposal might seem like a superhero, it is not. You can put many food and other items down through the disposal, but some will create future problems. And the following advice will be tempered or adjusted by the type of garbage disposal you have. Some find their disposal will dispose of anything. Others find they have to be very selective on what they put into the disposal. Smaller portions are better. Avoid greasy foods, fruit pits/seeds, bones, pastas and rice, nuts, coffee grounds, and any other substances that might build up in your sewer system. Maintenance Taking care of the health of your garbage disposal is important. Weekly — and no less than monthly — let your disposal while running gobble up some baking soda and vinegar. You can put both down the drain slowly and if you see foam develop, that’s fine, it’s normal. Alternate disposing of ice and also hot water. This helps with removal of the different types of debris that may attach to the blades of the garbage disposer. There are times when advice is just not enough. Do the right thing. Call your professional cleaning company. After all, it pays to call a pro! Cleaning Grease
Your appliances all play a vital role in the household, and especially more so during winter and the holiday season. With family, friends, and others close to you all gathering together and enjoying both festivities and home-cooked meals, your appliances can take a beating that requires regular attention and the occasional dreaded “deep cleaning” chore. From the toaster to the coffee pot to the stovetop and deep inside the oven, you may have noticed grease build-up that a simple wiping off doesn’t handle efficiently. Add to all of this the fact that hot cooking grease at certain temperatures becomes airborne and lands on allsurfaces in the kitchen. The amount of greasy soils that can accumulate can be tenacious if you don’t stay in front of it. So — what’s yourgame plan? Cleaning products What your need is a degreasing product, something that breaks down congealed grease on the surfaces of appliances, countertops, everywhere. While you can purchase products from your favorite store, you can also make your own. If you take ¼ cup of dish detergent, add in 1-2 ounces of ammonia, and mix it all with 16 ounces of hot water, and for a bonus add a scoop of baking soda, you have an excellent tool to fight grease. Application Now it is time to go to work. Get your cleaning solution ready and start scrubbing. Let the product do the work. If needed, wet out the areas of concern and allow the solution to do its job. Keep wiping, keep soaking up the grease, don’t spare those paper towels! A better idea While everyone wants to do is simply buy a miracle ingredient from their grocery store and just get the job done. While that might work, it’s not always the best option. It takes much more to keep your home grease and soil free and healthier for your family. Do the right thing When in doubt, think about the experts you can use. Let them handle your toughest cleaning challenges, especially those that involve grease, appliances, and what you care about most – your home! After all, it pays to call a pro! The Nooks and Crannies
Your home has plenty of areas for dirt and grime to hide. Locating them may seem easy. Cleaning them effectively is something else. Most homeowners spend plenty of time sweeping, vacuuming, scrubbing, and cleaning areas that are obviously soiled and become soiled daily. There are areas that can really get gross in a short amount of time. Your bathroom “work stations” — also known as vanity cabinets — are prime locations for soil buildup. Let’s spend some time on how to tackle the chore of cleaning the bathroom vanity. One area of the home easy to ignore. After all, who looks in there besides the person searching out some face cream or hand lotion, among other items? The buildup of residues can wreak havoc over time. Think of hairspray that you use daily and that ends up on the top of the cabinet. It may be easy to clean when fresh but give it 10 or more applications and you have a “goo” that’s not giving up its tenacious hold on the counter. This isn’t to even mention toothpaste and other necessary items that get smeared on the same surface. Take some time each day — perhaps just a minute or so — to quickly wipe up any residues that land on the surface. Then, take some time each week — perhaps just five minutes or so — to open up any cabinet doors or mirrors that house storage behind them, remove all objects, and use a household cleaning solution to wipe down all surfaces. After a week, you will still be amazed at how much residue has built up in there. Imagine what could happen after a few months! And once a month, give your entire bathroom a close scrutiny and look for all those nooks and crannies that can be the host of soil. This could be behind the toilet, in the corners of shower stalls, where the soap resides on the bathtub edge. All these areas could use a good scrubbing each month, if not more frequently. And all this is besides the typical routine cleaning you no doubt give all your bathrooms. But when you need some realhelp, from your favorite cleaning service, do the right thing. Give them a call today. After all, it pays to call a pro! The Basics of Vacuuming
If you have carpet or rugs, you have a vacuum cleaner. A vacuum is absolutely necessary to keep your valuable carpet and rugs clean of particulate or dry soil. While vacuuming may seem like a basic housekeeping chore and simple to do, the biggest challenge is getting out the vacuum and actually putting it to use. Frequency How often you vacuum depends on the size of your family, and this includes pets. As a general rule, you should vacuum the main areas in your home, such as the living room, hallways, and other high traffic areas, one time each week per occupant. For example, if you have four people and one dog in your family, vacuum five times per week, in those high traffic areas. For low-trafficked areas, once per week should suffice. This might seem extensive and perhaps unnecessary, but it keeps your carpet and rugs virtually free of dry soil buildup. How to vacuum You might be thinking, “You just plug it in and push it across the floor.” Which is basically what you do. The problem is how fast you move and how much overlapping you cover when running the vacuum. While you may push the vacuum forward fast, slow down when you pull it towards you. This way the beater bar, if your vacuum has one, has a chance to work loose the soils. Also, overlap several inches from side to side so you have complete coverage of the floor. Choosing the best vacuum Quality matters when choosing a good vacuum cleaner. The cheaper ones at department stores may work fine for a while, but they quickly lose efficiency and often break down. Look at the reviews of any vacuum cleaner you are contemplating and spend a few more dollars on a superior model. Your carpet and rugs will be better off in the long run. Choosing a vacuum with a beater bar is smart. Especially with thick pile carpet, it helps remove more dry soil. Some choose vacuum cleaners with a bagless option. If you use a vacuum cleaner with a bag, change it out when about half full, for maximum efficiency. Purchase plenty of replacement bags and have them on hand for this purpose. Get with the pros Cleaning companies, especially those who specialize in carpet and rug cleaning, can help you choose a quality vacuum. Get their input. After all, it pays to call a pro! When Insurance Fails
Devastating pipe breaks, failing sump pumps, a smoky kitchen fire, the roof leaking from damage from high winds… no one wants to deal with anyof that. But it does happen, and when it does, you probably do what is natural – you pick up the phone and call your insurance company, most likely your insurance agent, who may direct you to anyone from a central call center to handle your claim, an insurance adjuster, or perhaps to a local disaster restoration contractor they know. And then the fun begins. You aren’t sure yet if you have coverage, because the insurance company is dragging its feet. The adjuster isn’t able to come out for a few days, something you can’t believe. You worry, fret, and wonder if the damage to your home will be covered, and if you will have to pay for some (or all?) of the damage. You know you have to cover the deductible, and that’snot cheap. The work begins. Everyone is in a hurry because if the damage isn’t fixed right away, other issues will surface. The restoration contractor does what he is trained to do, and the work progresses nicely, and eventually all is well again at home. A few days late, the adjuster shows up. And he delivers a devastating blow. While you have coverage, the cost to repair the damage is more than the insurance company feels is fair, so they will only pay a percentageof the costs. The rest? You have to pay for that yourself. What can you do? One thing is to get another opinion. Hiring an independent insurance adjuster to review the job, all the paperwork, and your insurance policy might shed light on the issue and give you more info you need. Depending on the new information you receive, you can revisit the issue with your insurance company. Taking this information to the insurance adjuster who you are battling with probably won’t do much good. It’s time to go over his head, as the saying goes. If the difference between the costs of repairs and the offer from the insurance company is high enough, you can also consider a claim to the state entity (such as the insurance commissioner) that has authority and power to help. Many claim to be subject to bad business practices. You might be advised to hire an attorney, all which will cost you more. The good news is if you hire the very bestdisaster restoration company, they have the experience to help you deal with all of this. After all, it pays to call a pro! The Battle Against Garbage Can Odors
There’s nothing too exciting about garbage cans, except how you feel if you pull a full trash bag out and it bursts and spews all kinds of undesirables all over the kitchen floor. If you have garbage, such as limp lettuce, fermenting flounder, greasy goat cheese, and much more, you will have odors from it. Odors naturally occur from bacteria, which is what grows quickly on organic material. And then you have mold adding to the issue. All this fermenting in a dark, damp playground known as your garbage can. Even if you have a secure trash can lid, the odors have a mind of their own and an evil intent to escape. There are several things you can do to limit the effect of garbage can odors. Take out the trash It may seem simplistic, but most of us wait too long to take out the trash. A smell garbage can inside is terrible – the one outside waiting to be hauled away isn’t much better, but at least it is outside. Make it a practice to take out the trash before the bag is full. Use quality scented bags By quality, we mean bags that have a thicker mil rating, as they won’t break as easy. Yes, they cost more and use more plastic. Look at keeping the mil for your trash bag at 2 or above. The scented bags really do a great job hiding, not removing, odors. They mask bad odors and give you more time between taking out the trash before you start to notice odors. Use baking soda Baking soda is a typical household fixture. By sprinkling baking soda in the bottom of your garbage can and even in the bag, it helps to limit the odors caused by bacteria. It does this by absorbing odors instead of them being released into the air you breathe. Give it a hosing Like all things, garbage cans need to be cleaned. You might say, “I use bags!” but that doesn’t matter. Odors build up no matter what you do, and a good cleaning with baking soda or other cleaning products, and hosing or rinsing out the can, will help keep lingering odors at bay. And like all things, quality cleaning of the surfaces in your home are better performed by the pros. Do the right thing, call your favorite cleaning company when you need help. After all, it pays to call a pro! |
Would you like to get your own OutPost Site? Cleaning and restoration firms who are MarketingZoo.com members get
|
CleaningOutpost.com Directory of Cleaning & Restoration Businesses is a service offered by MarketingZoo.com
Copyright 2015 Thinkshortcut Publishing, LLC
Copyright 2015 Thinkshortcut Publishing, LLC





 RSS Feed
