|
How Evaporation Works
The U.S. EPA says, “Evaporation is the process that changes liquid water to gaseous water (water vapor). Water moves from the Earth’s surface to the atmosphere via evaporation.” Is there more to it? For your home, yes. While there is science to evaporation, and entire industries are dedicated to studying and implementing the science, when things get wet, such as from a failed sump pump, a broken pipe, or water intrusion issues, understanding evaporation and using that knowledge is essential. If you get light water damage, such as something covering a few feet, you will probably attempt to dry it yourself. Whatever you do, make sure you get it completely dry. This is where the science comes in. Evaporation is increased with both air flow and dehumidification. You may have a small dehumidifier, but there is no doubt you have a few fans. By moving air across the wet surface and relying on a dehumidifier to remove the water from the air, you increase evaporation. However, removing water from a surface and not dehumidifying the air means it will take everything longer to dry. When water damage occurs, it’s critical to work on removing the moisture and restoring property right away. This is tough to do without the right equipment, not even considering the time involved. Let the pros do it. If your home has a basement, you probably have moisture. You need to manage that. Opening windows isn’t usually a good option. Installing effective dehumidifiers is one of the best ways to keep a basement dry all the time. You can increase their effectiveness with airflow to move the air around. If your basement walls are constantly wet, it would be smart to have an inspection by an expert who specializes in dry basements. Shop around and look at the reviews. This could get expensive but could also be necessary. Professional contractors use professional tools for almost all water damage or other moisture issues. They have specialized equipment, such as air movers and dehumidifiers, and they have methods to monitor the drying process. These professionals create optimal conditions for evaporation, including controlled temperature, airflow, and humidity levels during the job. So call your favorite restoration company. You don’t want more damage to occur, and you don’t want mold to grow. After all, it pays to call a pro! How to Load a Dishwasher
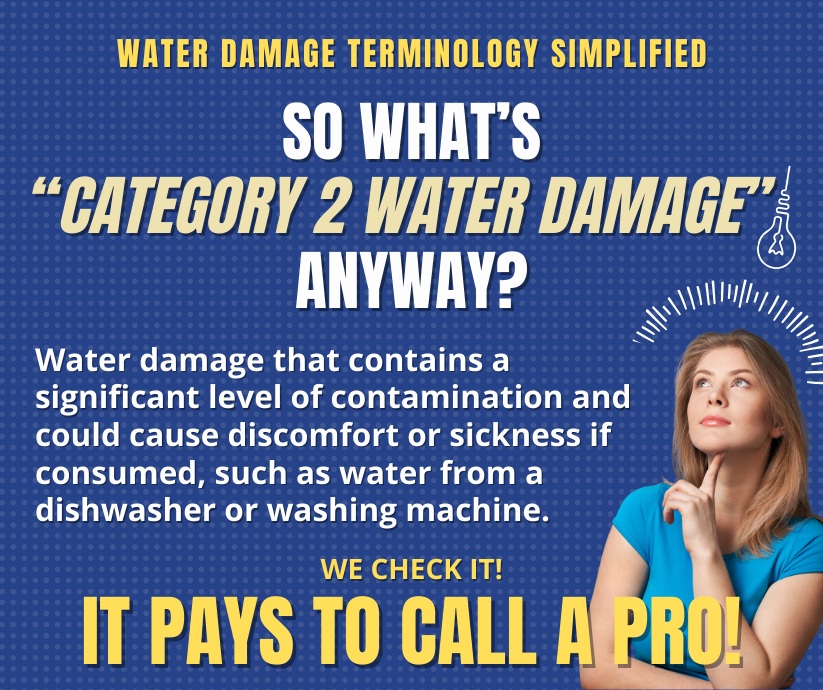
You open the dishwasher, pull out a rack, and drop a dish into a slot. You keep doing that until there is no more room and push “start.” Is that the best way to load a dishwasher? Loading a dishwasher may seem like a simple task, but doing it right means sparkling clean dishes, and doing it wrong means scraping the crud your dishwasher missed and then just redoing a load. There are a few easy, expert tips you can implement to get the most from your faithful dishwasher. Pre-Rinse You don’t need to do this with a modern dishwasher. They are designed to remove food residues, and they do it well. While you should scrape large food particles from your dishes, put them in the dishwasher dirty. Give your dishwasher a chance. Dish Placement If you want hot water to spray easily on all surfaces, put large items on the bottom rack, as the directions should say. Face them inward toward the spray jets, but leave room for water to spray up and past those, reaching other dishes. Your dishwasher may have more than one spray arm, but it doesn’t hurt to leave gaps between dishes so more water flows throughout the interior. The Top The top rack, that is. All your smaller items go here, including cups and glasses. Place everything so dishes won’t tip over. If you have plastic dishes to wash and are concerned about the high heat and possible warping, those should go right at the top. If you are really concerned, you know what to do: Wash by hand. Utensils Your dishwasher has a special place for utensils, and you might think, “I’ll just put them all in there, and all good.” That might work, but some utensils, such as forks and spoons, can stick together, limiting cleaning. Put some upright, some upside down, and leave room for water circulation. The Right Stuff When choosing a detergent for your dishwasher, do your research. Look at the reviews. If your dishwasher has a prewash option, use it. It’s there for a reason. While you may do your dishes, you should leave some cleaning for the professionals, such as your carpet, furniture, and hard floors. Those are tougher than dishes. After all, it pays to call a pro! How Mold Works
Mold is everywhere. It’s easy to spot if out in the open; you can smell the mustiness. While it can hide, such as behind walls, it doesn’t stay just on the surface … mold spores travel, and some have severe reactions to any exposure. Ubiquitous in the natural environment, mold serves a vital role outdoors by breaking down dead organic matter, such as fallen leaves and trees. However, mold growth poses a significant concern where you don’t want mold (indoors). Because of how mold grows, with tiny, invisible spores that drift through outdoor and indoor air, mold finds fertile ground for growth when landing on wet surfaces. The United States Environmental Protection Agency says this about mold: “Molds reproduce by means of tiny spores; the spores are invisible to the naked eye and float through outdoor and indoor air. Mold may begin growing indoors when mold spores land on surfaces that are wet. There are many types of mold, and none of them will grow without water or moisture.” Identifying types of molds is a challenge, as they come in all shapes, sizes, colors, and more. Professional mold remediators are experts at identification. Mold is not considered a plant. It is considered a fungus, but like a plant, it needs a food source and certain conditions to grow. If you have a dark, warm area and add some moisture to it, along with a food source such as wood products or even dirt, you have the recipe for mold. The challenge with mold, whether avoiding it or removing it, lies in moisture management. The presence of mold in your home necessitates prompt cleanup and removal of any water-related issues. Many experts say drying water-damaged areas and items within 24-48 hours of the damage occurring is important to prevent mold growth. Health concerns warrant attention. Consulting a health professional before commencing cleanup is advisable, especially if pre-existing health conditions are a concern. While molds are a natural part of the environment, their presence indoors demands proactive measures. Through effective moisture control and timely cleanup, in conjunction with consulting professionals, homeowners can minimize the risks associated with mold growth, ensuring a safer and healthier living environment for everyone in the home. If you ever do have any water intrusion issues and especially with mold concerns, do the right thing. Call your favorite disaster restoration company. After all, it pays to call a pro! The Dirty Sponge
We all need towels, rags, or sponges to clean hard surfaces in our homes. The ubiquitous sponge is a very common one found in virtually all kitchens and most bathrooms. They are used to clean everything, from dishes to countertops to stovetops and more. And while we tend to toss paper towels into the garbage can, or wash cotton or other cloths when we do the laundry, at times the sponge can be used and reused and weeks—even months—can go by without cleaning the sponge itself. How can you clean and reuse sponges? According to the United States Department of Agriculture (USDA), your microwave or dishwasher is one of the best ways to clean them and kill bacteria simultaneously. They can eliminate nearly 100 percent of bacteria, helping you to maintain proper hygiene practices. For cleaning and disinfecting sponges in the microwave, thoroughly wet the sponge before putting it inside. Do not microwave a dry sponge, that’s a fire hazard. Microwave the wet sponge on high for just one minute. That zaps the bacteria. Take it out, thoroughly wash it with soap and water, and wring it out and you now have a fresh, clean, healthy sponge to use again. Your dishwasher is effective as well, but not as quick. When you wash your dishes, put it on the top rack and let the dishwasher do all the work. It’s pretty simple. Having the drying option activated means it gets that high heat, which will kill bacteria. But there comes a time when you need to make a hard decision. Yes, that sponge has been faithful, but a kind but firm farewell is warranted after so many uses. The USDA recommends replacing sponges every two weeks to minimize the risk of bacteria buildup and even more often if they get a funky odor. Most do not follow this recommendation, but it's an option if your budget for sponges is healthy. Other maintenance tips include wringing them out in hot water after every use and allowing them to dry completely by putting them in a spot that provides fresh air and even sunshine, which is often possible in a kitchen. Keeping your home nice and clean and healthy is important, and besides doing some of the tasks yourself, there is a better way. Call your favorite cleaning company today, especially for those tough project jobs such as tile and grout cleaning, carpet cleaning, and furniture care. After all, it pays to call a pro! How Flash Floods Work
This is the time of the year when we need to think about the possibilities of heavy snowfall, rain, and especially spring flooding, such as flash floods, which could be right around the corner. Flooding is a natural disaster that can devastate homes, causing extensive damage and chaos for your family. Understanding how to first prevent and, if the unthinkable does occur … recover from flooding is essential for homeowners. Let’s look at what flooding is and where and when it can occur so you can analyze your own situation and prepare—if needed. Flooding occurs when an overflow of water inundates land that is typically dry. Various factors, including heavy rainfall, coastal waves, rapid snowmelt, or the failure of dams and levees, can trigger it. Floods can wreak havoc with as little as a few inches of water or submerge entire houses, lasting for days, weeks, or even longer. Floods are the most widespread of all weather-related natural disasters. Flash floods are hazardous as they combine the destructive force of floods with incredible speed. These occur when heavy rainfall exceeds the ground's ability to absorb it. Flash floods can also result from water filling ordinarily dry creeks or streams or when streams overflow their banks, causing rapid water rises within a short timeframe. These events can unfold within minutes, leaving little time for public warning and protection. The only good news here is this doesn’t occur everywhere, but you should know if you are in a zone that could be affected. Do your research. Areas at Risk The first would be densely populated areas. Urban development, including buildings, highways, and parking lots, increases runoff by reducing ground absorption and elevating the risk of flash floods. The failure of storm drains is also a concern. In cities and towns, underground routing of streams into storm drains can overflow during heavy rain, flooding nearby roads and buildings. Even low spots can be a concern, such as underpasses, underground parking garages, basements, and low-water crossings. Areas near rivers, mountainous regions, and when dams release water for safety reasons, are all concerns as well. If your home is in the pathway of possible water, prepare your home with smart landscaping and other means to keep water from entering. What You Can Do While the risk of flooding is always there, you can prepare. Having a professional restoration company on your side will help bring your damaged home back to pre-flood condition. Contact your favorite restoration company and get their help if something does happen. After all, it pays to call a pro! Create a No-Pet-Hair Furniture Zone
As pet owners, we love our furry creatures and the company and comfort they bring to us. But with that is one challenge we often face: Dealing with pet hair on our furniture. If you're tired of constantly battling pet hair on your sofa, loveseat, chairs, or anything that is made of cloth, here are some effective strategies to keep your furniture looking clean and pet-hair-free. Vacuum for the Deepest Clean The most basic and efficient method to removing pet hair from your furniture is by thorough, detailed vacuuming. Regular vacuuming using an upholstery brush attachment can remove loose pet hair and also embedded dander, which is what causes allergic reactions. If you don't have the proper attachment, consider investing in a universal attachment set with an upholstery brush and a crevice tool for those hard-to-reach areas. There are many small, hand-held devices that are perfect for this. Use Hair Removal Tools Turn to handy tools like sticky rollers and furniture brushes between vacuuming sessions. Oversized sticky rollers or those with extendable handles are particularly effective on upholstered furniture, covering more surface area with each pass. Common Household Items You don't always need specialty tools to combat pet hair. Everyday household items can be just as effective. A straightforward method is to put on a rubber glove, dampen it, and run your hand over the sofa's surface, causing the hair to ball up for easy pickup and disposal. Groom Your Pets Prevention is a great way to keep your furniture pet hair-free. Regularly groom your pet with guidance from your vet or groomer to reduce shedding and maintain a healthy coat. Grooming gloves, which help reduce shedding and straighten hair follicles, can effectively remove pet hair from your couch. Now what? Vacuuming, hair removal tools, everyday household items, textile preparation, and regular grooming of your furry companion can make all the difference in keeping your furniture fresh and comfortable for you and your pets. But there’s more! Don’t forget that removing pet hair is just part of maintaining your furniture. Having your furniture professionally cleaned on a regular basis is recommended. Do the right thing and call your favorite cleaning company now for an appointment. After all, it pays to call a pro! How Condensation Works
While most don’t worry too much about it, condensation can damage surfaces in your home. Understanding how it works and then dealing with it will protect your home from unexpected damage. How does it happen? Condensation occurs when moist, warm air cools down and can no longer hold all the water vapor it contains, causing that moisture to condense into water droplets and land on surfaces. Here is a quick guide to how condensation works: Temperature Difference: Condensation typically occurs when there is a temperature difference between indoor air and a surface. Think of how moisture builds up on the inside of a window. Even when you can’t easily see it, this type of condensation can occur. Dew Point: This is the temperature at which air becomes saturated or full of moisture and can no longer hold all the water vapor. When the temperature drops below the dew point, condensation forms on surfaces. Water Droplet Formation: As warm, humid air meets a colder surface, it loses heat to that surface. This causes the air temperature near the surface to drop below its dew point, which means water droplets will form on the surface. Effects on Surfaces in Homes Condensation on windows is a common occurrence during colder months. It can lead to water droplets on the glass, which, if not addressed, can create moisture-related issues. Prolonged condensation on windows can contribute to mold and mildew growth, damage to window sills, and even wood rot in severe cases. Condensation on interior walls and ceilings can result in water stains and discoloration, which can be tough to remove. Over time, it can lead to mold, which many consider a health concern, in addition to the damage mold can do to materials. Attics and crawlspaces can also be affected. In areas with poor ventilation, condensation can accumulate. This can damage insulation, wooden structures, and roof materials, potentially leading to costly repairs. Basements are a big concern as condensation can lead to dampness, water damage, and mold growth. It can also affect stored belongings and cause an unpleasant odor. Preventing condensation and addressing it promptly can help maintain the structural integrity and overall comfort of your home while minimizing the risk of moisture-related issues. If you have any questions or concerns about any moisture issue, especially after a flood in your home, do the right thing and call your favorite restoration company. After all, it pays to call a pro! Cleaning Up After the Holidays
Cleaning up after the holidays (or any party) can be challenging, especially when dealing with decorations, leftovers, and the general aftermath of festivities. Here are five good cleaning tips to help you tackle the post-holiday mess effectively: 1. Declutter First: Start by decluttering your home. Begin with the holiday decorations, taking them down and packing them away carefully. Dispose of any broken or worn-out decorations. Also, go through gifts, wrapping paper, and packaging materials to recycle or properly store them. Clearing out the clutter will make the cleaning process more manageable. 2. Deep Clean Your Kitchen: The kitchen is often the heart of holiday gatherings and can accumulate dirt and grime. Focus on cleaning your appliances, countertops, and sink thoroughly. Remember to clean the oven and microwave if you've done a lot of cooking. Wipe down the cabinets and mop the floors. Dispose of any leftover food items that have gone bad, and then organize your pantry and fridge. 3. Tackle Stains and Spills: Holiday celebrations can lead to spills and stains on carpets, upholstery, and tablecloths. Act quickly to clean up any spills, using appropriate stain removers or gentle cleaning solutions for delicate fabrics. Steam clean carpets and rugs if necessary. Launder and spot-treat table linens and cloth napkins to remove food or drink stains. 4. Bathroom Cleanup: Bathrooms can be used often during holiday gatherings. Disinfect and clean the toilet, sink, and bathtub or shower. Replace any used or empty toiletries like hand soap and toilet paper rolls. Wash and replace guest towels and empty the bathroom trash cans. 5. Dust and Vacuum: Dust and vacuum your entire home after the decorations are down and the clutter is cleared. Pay special attention to areas that may have accumulated dust during the holiday season, such as shelves, mantels, and corners: vacuum upholstered furniture, curtains, and blinds to remove any lingering dust or pet hair. Bonus Tip: Divide tasks among family members to make the process faster and more efficient. Put those kids to work! Following these cleaning tips, restore your home to its pre-holiday cleanliness and start the new year with a fresh, organized living space. And when you really need some serious help with any cleaning task, such as carpet, upholstery, tile and grout, do the right thing. Call your favorite cleaning company. After all, it pays to call a pro! |
Top Cleaning & Restoration ULTD
|


 RSS Feed
|
|
Would you like to get your own OutPost Site? Cleaning and restoration firms who are MarketingZoo.com members get
|
CleaningOutpost.com Directory of Cleaning & Restoration Businesses is a service offered by MarketingZoo.com
Copyright 2015 Thinkshortcut Publishing, LLC
Copyright 2015 Thinkshortcut Publishing, LLC